Check out the photo below and count how many Railfence blocks we used.
 |
| Can you spot the railfence block? How many times is it used? |
I found a pattern on line of a Railfence quilt layout and printed it out. I got a pen and outlined where each block was, then I figured out the measurements, block size, and colors. I did all of that from one printout online.
 |
| My printout from the Internet with all my notes and fabrics I was going to use for this quilt. |
Step 1: Choose a light, medium, and dark fabric and cut 8- 2 1/2" x 42" strips from each fabric.
Step 2: Arrange 3 strips of each color how you desire. In my sisters quilt, I chose colors that would match her décor in her apartment. So I decided to arrange the strips with Khaki sewn to the green and then the green sewn to the Red.
Step 3: After you have sewn all the sets of 3 fabrics together measure your strip set to see how wide the strips are. If my calculations are correct you should be cutting the strips into 6 1/2" squares and you should have about 48 squares. Now comes the fun part of using the Railfence block.
Step 4: Take two of the blocks you just cut and layout 6 of them in a row. You can start the first one laying vertical then the next block in line turn horizontal. Do this until you lay out your first row. Then the 2nd row do just the opposite. You will have 8 rows of 6 blocks. Using your creativity, audition diverse ways to turn the blocks to create whatever pattern you desire. Here is what pattern I chose:
I chose to have my light color on the outside on the first block and on the top of the second block. And then continued that pattern all the way across.
Step 5: sew the blocks together in each row.
Step 6: Sew each row together to complete your quilt top.
Step 7: I added two borders, an inner border using the "Khaki" Fabric and the "Blenders Red" for the outside border.
Step 8: Sandwich the backing, batting, and quilt top then quilt however you desire. I chose a simple "Stitch in the Ditch" and scalloped the edges before binding the quilt. For my backing I used "Calico Leaf" green fabric with the Khaki fabric for the binding.
There are many variations you can do with this quilt including how many colors you use in each strip.
Let me show you the baby quilt I made using five fabrics instead of three. My quilt instructor at "Sun Valley Quilt" shop showed me how to make this one. It's one of my most favorites.
I'll give the directions and measurements below.
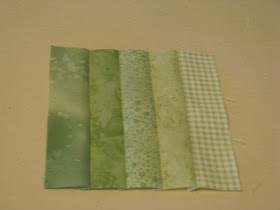
You will need 5 fabrics of the same hue, we did green. we started with a dark green and chose four other fabrics each lighter than the previous one. You want your first fabric to be dark and your last fabric to be light. This is also a great way to learn the differences between lights, mediums, and darks, hues, shades and color choices.
You will do 7 Railfence blocks across and 8 blocks down.
Cut your 5 fabrics into 1 1/2" strips.

Sew 1 strip of each color together. Rinse and Repeat, OK Sew and Repeat.
This is what you should get after you've done all your sewing:

Now cut from each strip set 5 1/2" squares. Again, Cut and Repeat until you have 56 blocks.
Arrange these blocks to create whatever pattern you desire just by turning the blocks and matching colors. You should have enough blocks to do 7 blocks in each row with 8 rows. Have fun playing with colors and hues.
These are pretty fast and easy quilts and the results are amazing just by the way you turn the Railfence blocks.
 |
| Baby quilt for my cousin, Mandy, in Australia for their first baby. |
 |
| Quilt for my Sister, Bree, to use as décor in her condo. |


